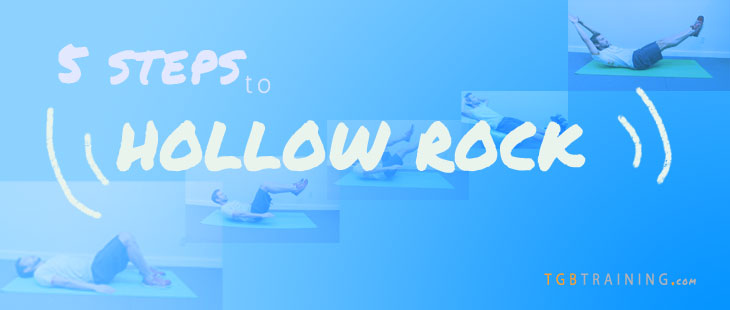
The Hollow Rock is a core exercise often found in CrossFit and gymnastic workouts. It is also beneficial for endurance athletes, but I rarely see it used by runners, cyclists or triathletes. The movement recruits muscles deep in the core which are often missed during traditional ab workouts. Training these muscles will increase core stability during pretty much any sport, or strength training program. That increase in stability will reduce your risk of injury and give you a stronger foundation to build power from.
Read on and you will learn:
- How to Hollow Rock correctly
- If you cannot Hollow Rock, where to start without getting injured
- What exercises to use and when to progress to train your core to Rock like a champion!
All good things. Here’s the downside… It is HARD 🙁 Most anyone who has not pre-trained the specific muscles used in the Hollow Rock will struggle with this movement at first. If we can conquer it abdominal glory awaits. Where do we mere mortals start? At the beginning.
“It hurts my back.”
When I first added the Hollow Rock to clients’ routines I got lots of negative feedback. “It hurts”, and “I’m getting stiff in the back” were regular reactions. Not the result I, or they, wanted. After digging deeper I found most weekend warriors and seasoned athletes alike, cannot do this movement correctly. Why? Their cores were not strong enough. This is a tough position to hold without targeting the deep abdominal muscles needed to complete it.
AWESOME!
We have identified a limiter that once conquered will benefit us in everyday life and lead the way for performance gains in lots of sports. Jackpot!
In my eyes if you can hold this position for even 3-4 rocks you are ahead of the crowd.
If your core is not prepared to fully extend your arms and legs Hollow Rocking will probably be too much for your back to handle. You will probably end up so fatigued you cannot hold the proper form and the result will most likely be a sore lower back. I do not like feeling older than I am. I’m guessing you don’t either.
So….
We have an exercise that if done correctly will provide us with great results. If done incorrectly it could cause soreness or injury. Don’t let that scare you off. Follow along to start safe, gradually build your core strength and progress to being able to do the real thing.
Goal: Strengthen our core well enough to do the Hollow Rock correctly.
How do you get to the top of a ladder? One step at a time.
Where does the journey begin? With the first step.
Start at the beginning.
If you are unable to correctly hold the Hollow Rock position modify it. Start with a position you can hold with less risk and skip the back pain. Test yourself starting with Step 1. It is the simplest and easiest version of the exercise.
If you can perform the graduation workout of a step with proper form then move on to the next step. Progressing this way will help you make your way up our proverbial ladder of abdominal excellence with less aches and pains.
Give yourself at least 24 hours between workouts. 48 hours is better to let your muscles fully recover.
STEP 1: STATIC CHAIR HOLD
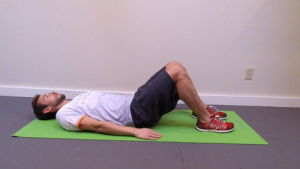
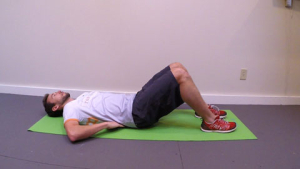
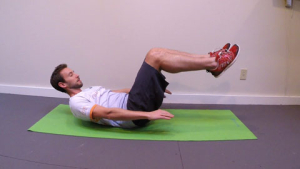
Key Points:
There are two things that drastically increase the difficulty of the Hollow Rock. Leverage or extending the arms and legs as far away from the core as possible, and movement. The rocking motion.
We take both of those out of the equation and start with the Static Chair Hold.
Start with 1 Set of, 5x 5 second holds
(20 seconds rest between reps, 1 minute between sets).
Once you can do the set above add another set at the next workout. Add sets of 5 reps until you can do the Graduation Workout below.
CLICK for STEP 1 Graduation Workout
Move to Step 2 if you can do,
5 sets of 5 second Holds
(20″ rest between reps, 1′ between sets)
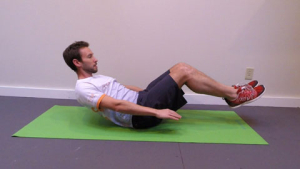
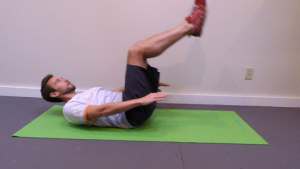
STEP 2: ROCKING CHAIR

Key Points:
Now that we have mastered the basic hold it is time to raise the bar. Enter movement.
For this step I suggest you work with a buddy for visual feedback. For some people it is hard to tell whether or not they are moving the hips. Having someone at your side watching will keep you from cheating and on track to ingraining safe and proper form.
Start with 1 Set of, 5x 5 rocks
(20 seconds rest between reps, 1 minute between sets).
Once you can do the set above add another set at your next workout. Add sets of 5 reps until you can do the Graduation Workout below.
CLICK for STEP 2 Graduation Workout
Move to Step 3 if you can do,
5 sets of 5 Rocks
(10″ rest between reps, 1′ between sets)
STEP 3: Alternate Days of SINGLE LEG EXTENSION HOLDS & ROCKS
In Step 2 we started moving. Time to add some leverage, so go ahead and extend a leg. Start with the Holds.
*Once you are able to complete 5 Holds you can start alternating workouts using the Rocks as well.*

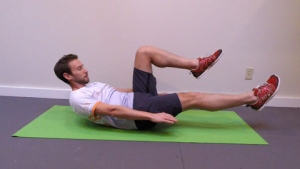
Day 1: Single Leg Extension Hold
Hold Key Points:
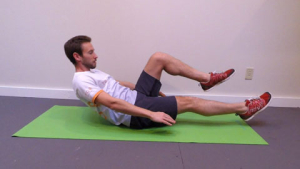
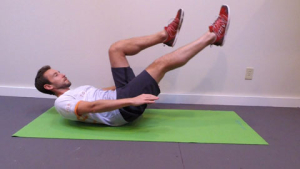
Day 2: Single Leg Extension Rock
Rock Key Points:
Once you are able to do both Holds and Rocks…
Alternate days of 1 Set of, 5x 5 rocks with,
1 Set of, 5x 5 holds
(10 seconds rest between reps, 1 minute between sets).
Once you can do 5x 5 add another set. Add sets as doable until you can do the Graduation Workouts below.
CLICK for STEP 3 Graduation Workout
Move to Step 4 if you can do,
3 Sets of 5x 10 Rocks
(10″ rest between reps, 1′ between sets)
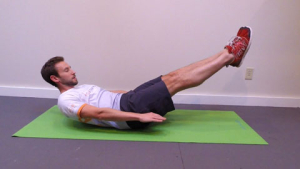
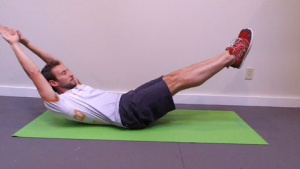
STEP 4: Alternate Days of TORTURE TWIST + HOLLOW HOLDS
This step is another combo of two exercises. You are going to alternate between the two each time you do an ab session.
For example:
Day 1 ab work includes the Torture Twist.
48 hours recovery.
Day 2 ab work includes the Hollow Hold
48 hours recovery.
Repeat until you can complete the graduation workout for both exercises.
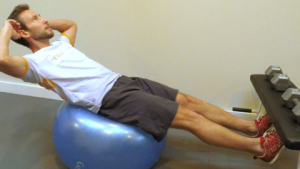
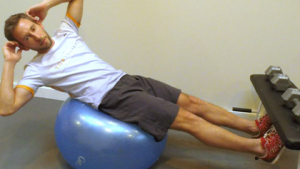
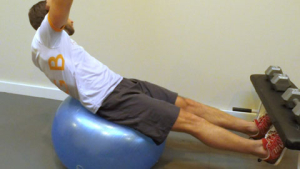
Day 1: Torture Twist
Twist Key Points:

Day 2: Hollow Hold
Hold Key Points:
Torture Twist:
1 Set = [twist left, hold 3 seconds. Twist right, hold 3 seconds.]
Start with 1 set.
Add 1 Set per week, or as core strength allows, until able to complete the Graduation Workout.
(Take 30 seconds rest between sets.)
Hollow Hold:
Start with 5 second holds.
Each week add another hold until you can do the Graduation Workout below.
(30 seconds rest between reps)
CLICK for STEP 4 Graduation Workout
Move to Step 5 if you can do,
Torture Twist: 3 sets with 3 second holds (30 seconds rest between sets)
Hollow Holds: 3 sets of, 5x five second holds (20 seconds rest between holds)
Step 5: HOLLOW ROCK!
This is it! The big day. You are about to become ab-mazing!

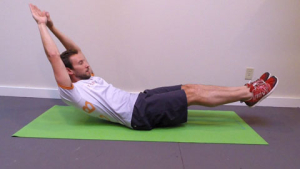
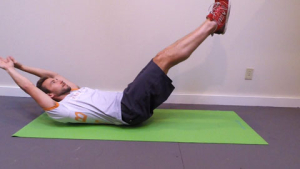
Key Points:
CLICK for STEP 5 Graduation Workout
You are on the way to ab greatness should you complete,
3x 10 Rocks
(1 minute rest between sets)
WRAPPING IT UP
Now that you have got it use it. Keep on rocking to maintain core strength. With a solid core foundation you are ready to build strength in compound exercises like the squat, deadlift, pull up, and more. I am curious to see where you see the biggest changes and benefits. Please take a minute and drop me a note to see how this progression has helped you. LESSONS TO CARRY OVER
- Engage the core for stability (push the back down)
- When all is lost start with the basics
- Build towards your goal in manageable steps
“How do you eat an elephant? One bite at a time.”
Thanks so much for following along.
Have feedback or questions you’d like to share? Shoot them on over in the comments section below!
If you enjoyed this article, please share it with others who might benefit from it. Just click your social media icon of choice at the bottom of this post.
THANKS again in advance!
